

Woodstock London - 24 Nov 2020
Advent Calendar Bunting

How did Christmas get so close? I am so ready for it, literally counting the days until I can get my lights up and make things feel a bit more cheerful! Here’s a little project that will do just that. A simple "how to" for a reusable calendar that doubles as decorative bunting. Grab your Palava scraps and let’s get making…
TO MAKE YOUR OWN YOU WILL NEED

• Selection of Festive fabrics – I used 5 different prints here but it’s up to you
• Matching cotton machine thread
• Number stamps/contrasting embroidery thread/fabric pen for adding numbers
• Paper for pattern making
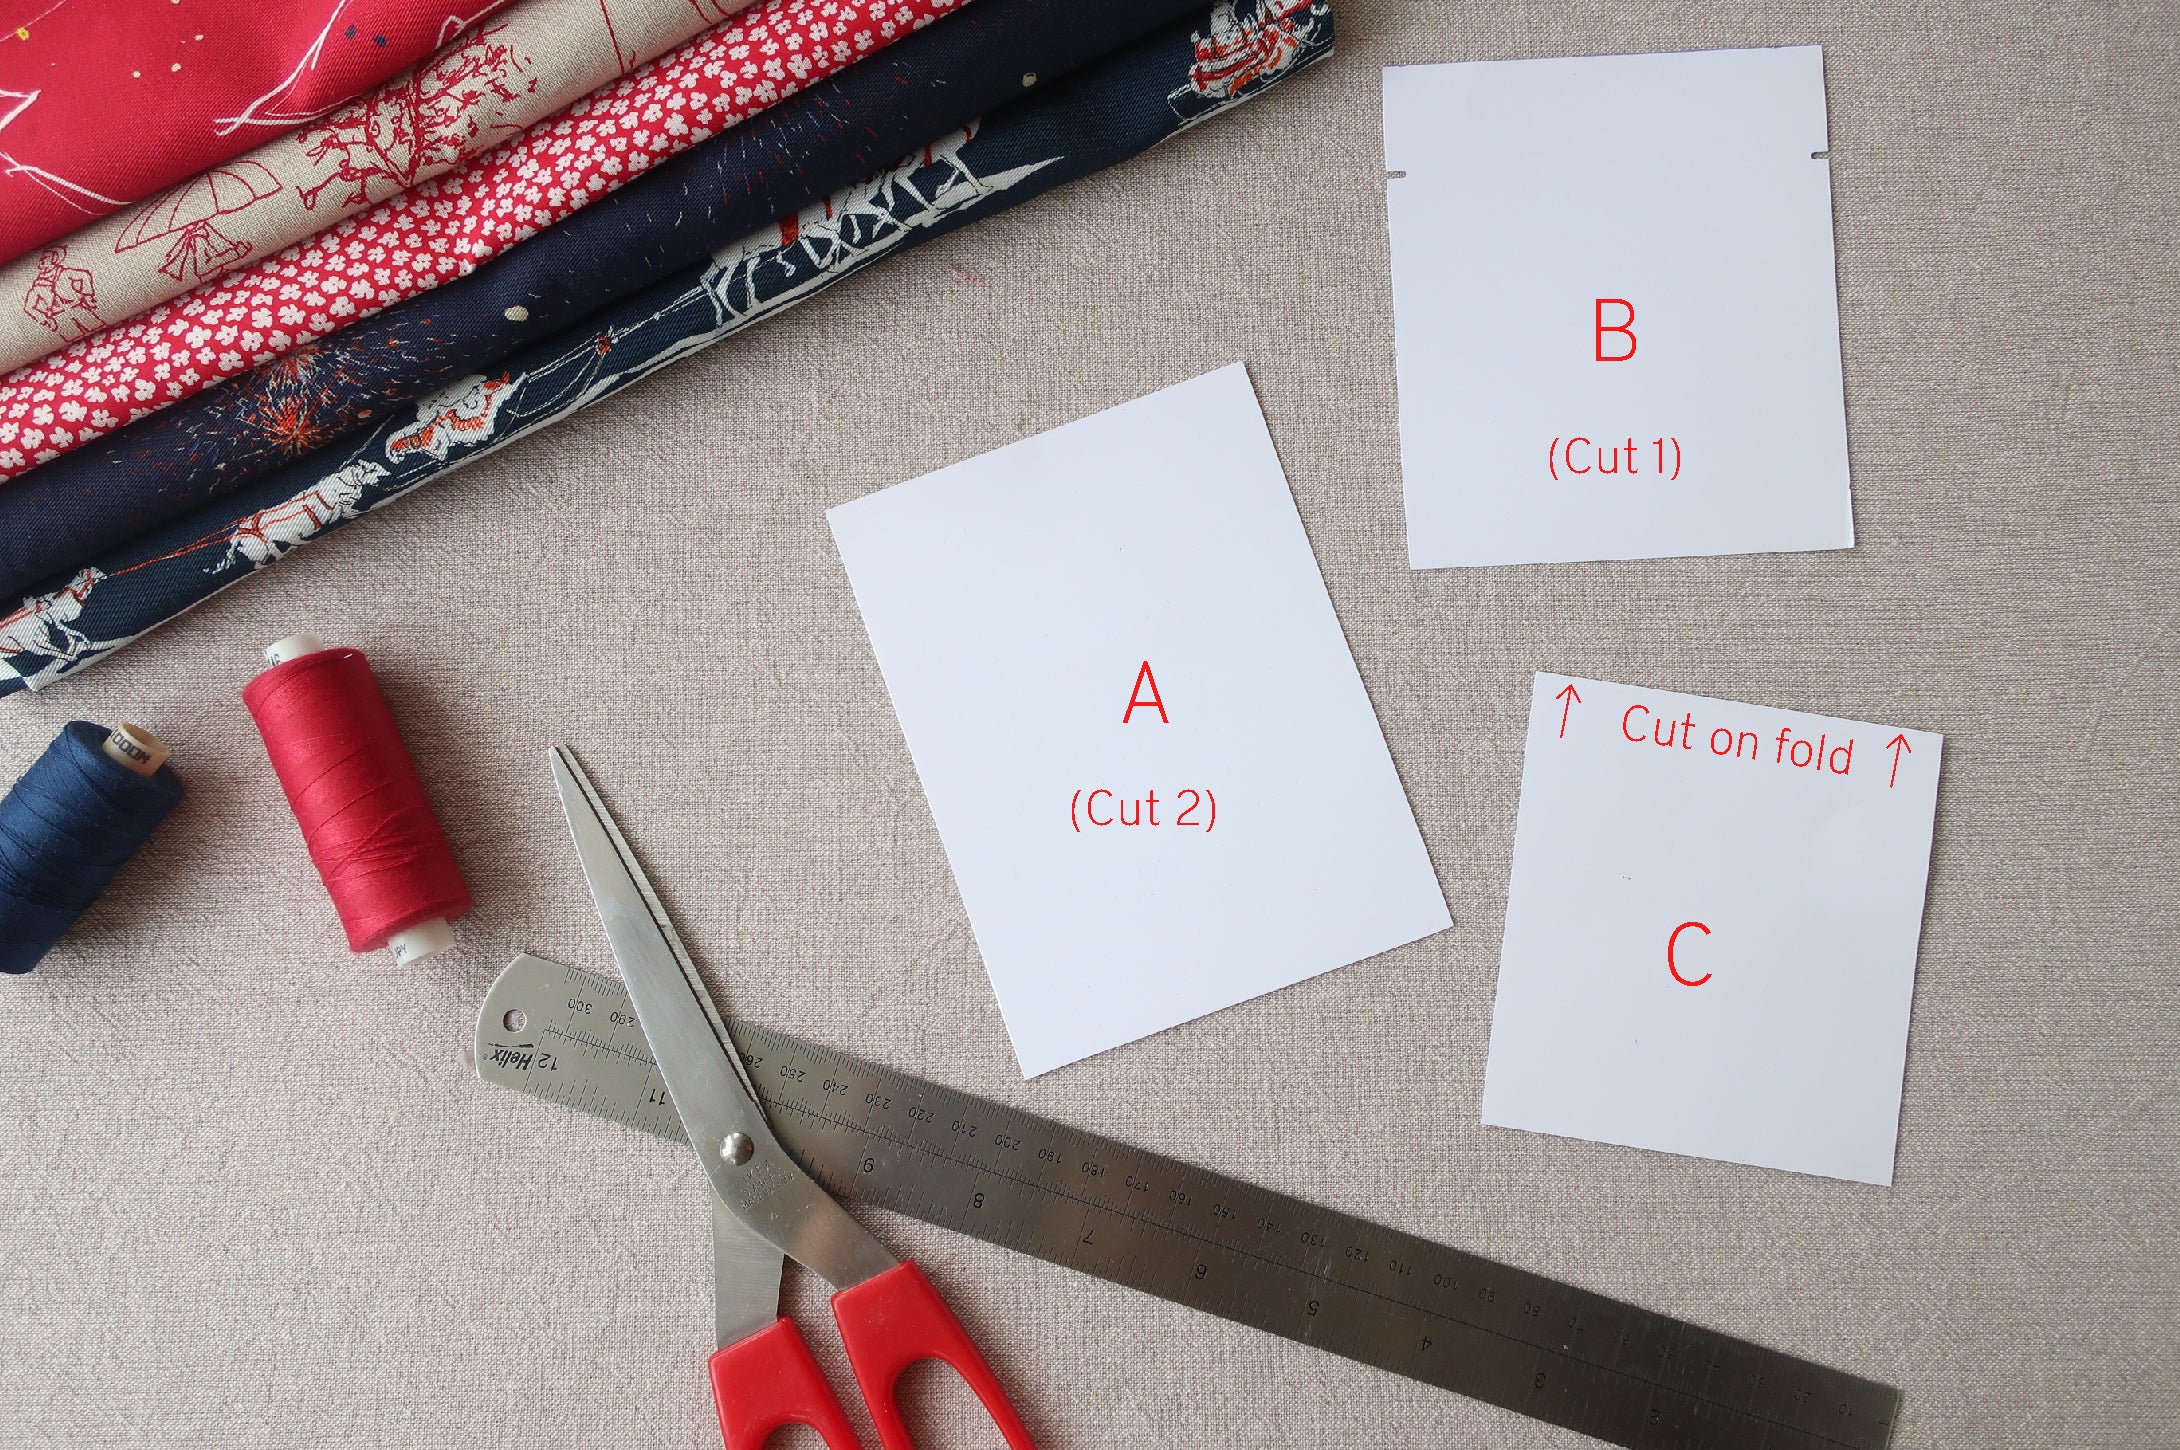
1. First step is to make up your pattern pieces.
Pattern A = 11.5 x 10cm
Pattern B = 13.5cm x 10cm
Pattern C = 9cm x 10cm (for finer fabrics only)

2. Pattern A is for the pockets on the bunting, mark notches 2.5cm down from the top edge, this will be your fold line to give you a nice edge at the top of your pocket. Cut out all the prints for your pockets and press this line down on each piece so they are ready to sew. You can use the same print or mix them up as I have done in the example.

3. Pattern B is for the bunting flags and you will need to cut 2 pieces for each day of the calendar. Lay out your pieces so you are happy with how the colours match or mismatch the pockets along the bunting string.
4. Pattern C is for the pockets that are in a lighter weight fabric. I loved this classic Poppy print, but as it is lighter weight it needed a bit more body. Cut it on the fold so that it is double weight and it will hold up much better when you put a little treat in the finished pocket.
5. Now sandwich your pieces together. Lay one of your B pieces right side up with the pocket on top, right side up, aligning your bottom corners. Then lay the other B piece face down on top and pin.

6. Sew around the sides and bottom edge leaving the top edge unsewn.
7. Trim the corners and turn the little pocket out, making sure that the calendar pocket is turned out with right side showing.
8. Steam press to flatten the pieces and repeat with all the days of the calendar.

9. Now to make the bunting string, I used the lighter weight again but you can use another quality. I cut it 6cm wide x approx 180cm and
I folded it in half lengthways and pressed it in towards the centre. Then I folded the edge in to meet the centre fold leaving a strip 1.5cm wide. With a thicker fabric you could cut it 5cm wide and just turn the sides in 1cm if it feels too stiff.

10. With about 30 cm at each end I pinned the binding over the top edge of the bunting flags with pockets outwards and left 2cm in between each flag. Sew along the edge all the way along.

11. Decide on your method off adding numbers to the flags, I used stamps I had at home, you could write them on, sew them on with a running stitch or chain stitch, or leave them blank and count along each day if you prefer.

12. Next to add all your little surprises and finds somewhere to hang your handiwork!
