FACE MASK
Face masks are big news at the minute. It's thought that wearing one can help reduce the spread of Covid 19 which in our books is a very very good reason to put one on, indeed.
Many people are struggling to get hold of face masks online so we thought we'd share with you a simple, free pattern download, along with step by step instructions so that you can create your own mask. It's really very easy!
One of the big plus sides of making your own mask is that you can use the fabric of your choice, making it a bespoke item. (If you haven't got any fabric to hand, take a peek at our fabric page where we're selling Palava designs from the archives... )
So, without further ado, let's get cracking.

TO MAKE YOUR OWN FACE MASK YOU WILL NEED:
- Sewing machine
- Palava Face Mask template (download the size you need), printed out.
WOMENS TEMPLATE
MENS TEMPLATE
CHILDRENS TEMPLATE
- 2x pieces of fabric (ideally a closely woven cotton) measuring 20 x 35cm
These pieces will make up the back and front of your mask respectively. We like to choose contrasting print designs, but the choice is yours!
- Filter.
We suggest N95 / pm 2.5 but any other layer you have, like folded blue roll or kitchen towel will do.
- 30cm elastic (we use 6mm wide elastic)
- Skewer, or small safety pin for threading the elastic through the mask
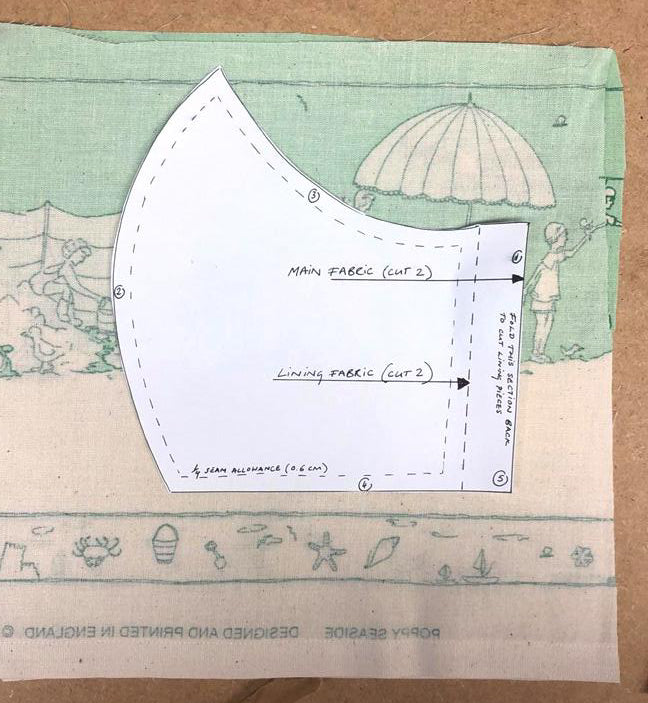
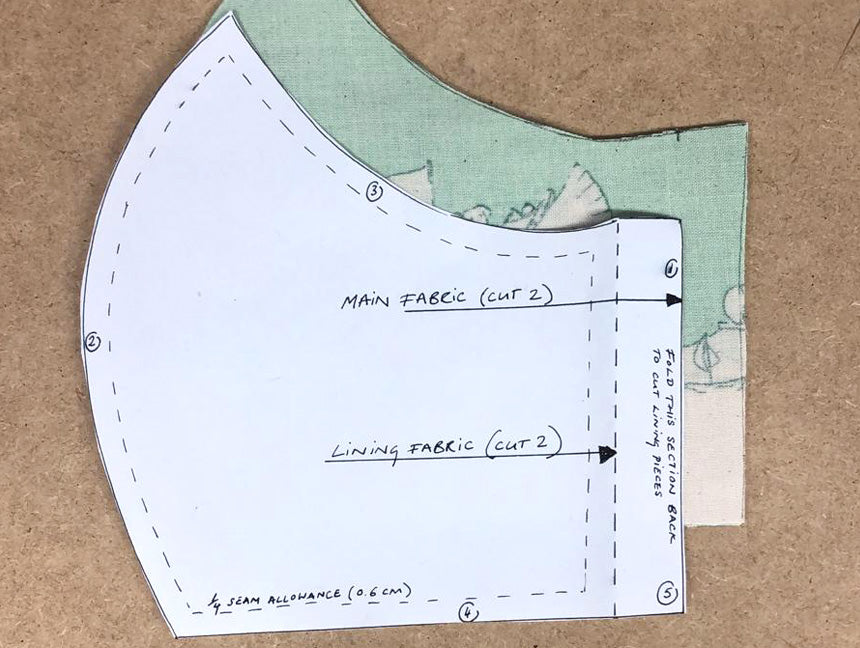
1. Download, print and cut out your paper template.
2. Fold the fabric that you've chosen for the outer part of you mask in half. Place paper template on top, with the bottom edge of the template running parallel to the bottom edge of your fabric (see photo).
3. Pin paper template in place through both fabric layers and cut out. Before removing the pins, make a small 2mm snip at the top and bottom of the dashed line marked by the arrow 'Lining fabric (cut 2)'. This will be a marker when you come to stitch the front pieces to the back.
4. Remove pins. You should now have the two front pieces of your mask.
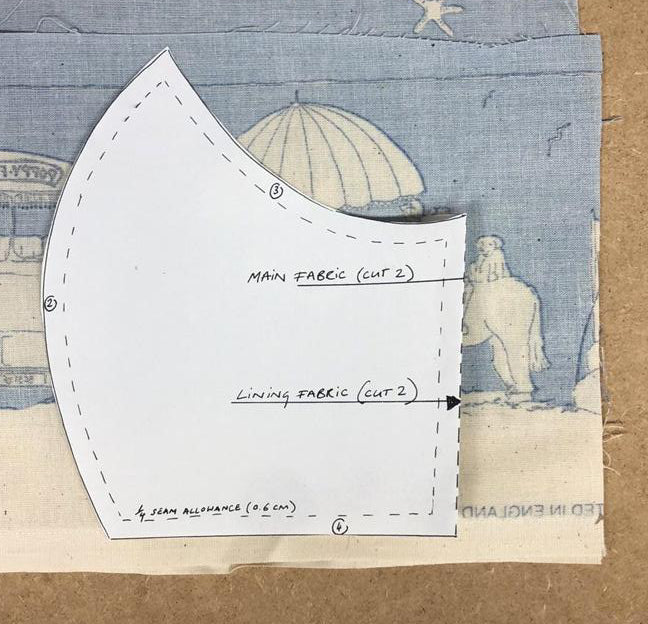
FOR THE LINING...
5. Fold your paper template back at the dashed line marked by the arrow 'Lining fabric (cut 2)'. This is now the template for the lining pieces of your mask. (see above photo)
6. Follow steps 2-4 using this new template shape. There is no need to snip notches this time.
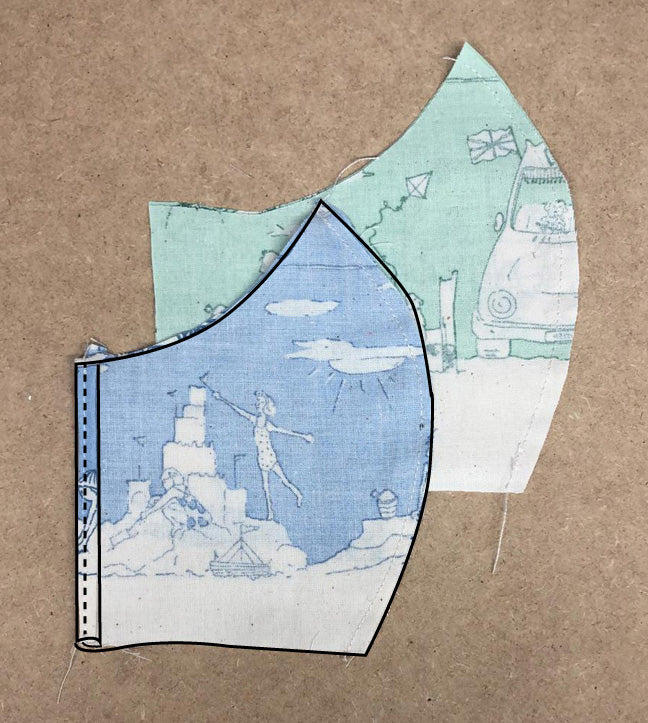
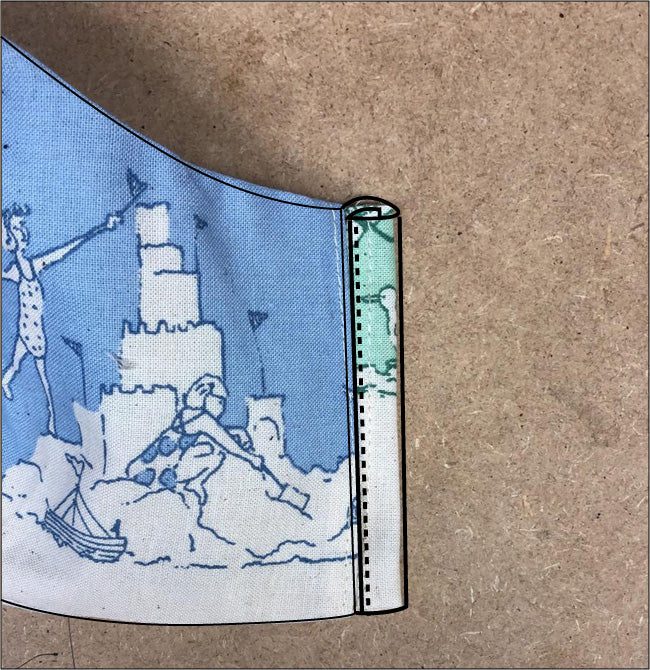
7. Take one piece of your lining fabric (in our case the blue colour) and fold the outer edge (marked with the numbers 1 and 5 at top and bottom) under twice and press. Each fold should be 5mm wide.
8. Stitch a single line down this pressed fold to secure in place (see photo). Repeat this process with the second lining piece. Now you have two nice finished edges that won't fray.
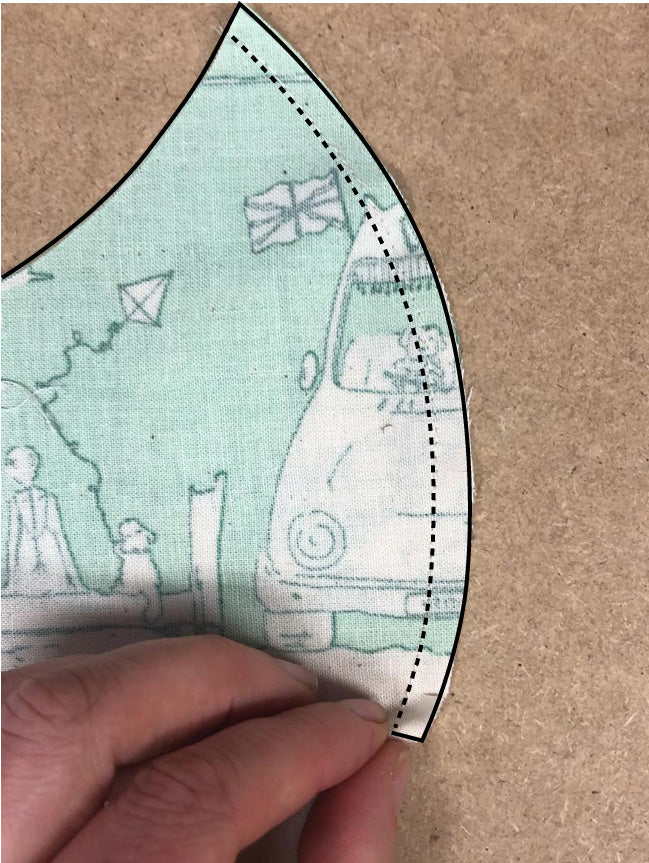
9. Take your two outer pieces (in our case, the green). With right sides facing, sew with a 2/8" seam allowance along the curved edge (marked '2' on the template).
10. Snip little notches along the curved edge (although not too close to the stitch line) and press the seam.
11. Repeat this process with your two lining pieces.
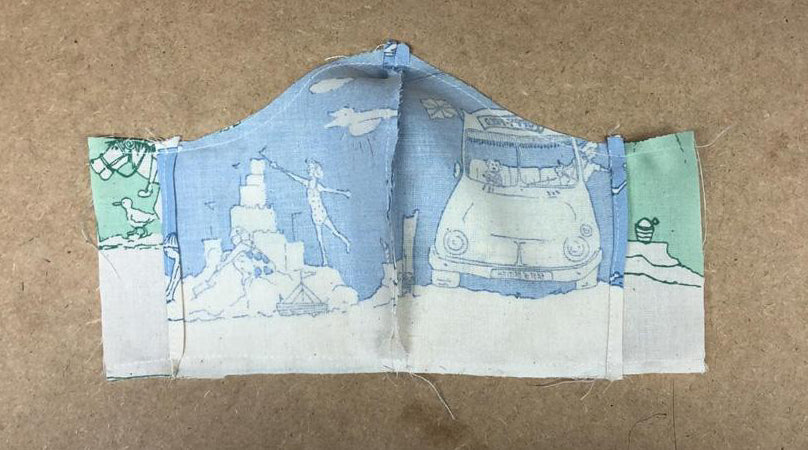
12. Place outer piece and lining piece together, right sides facing and sew along the top and bottom with a 2/8" seam allowance. Your lining piece should be smaller than your outer piece (see photo).
13. Press seams and turn the right way out
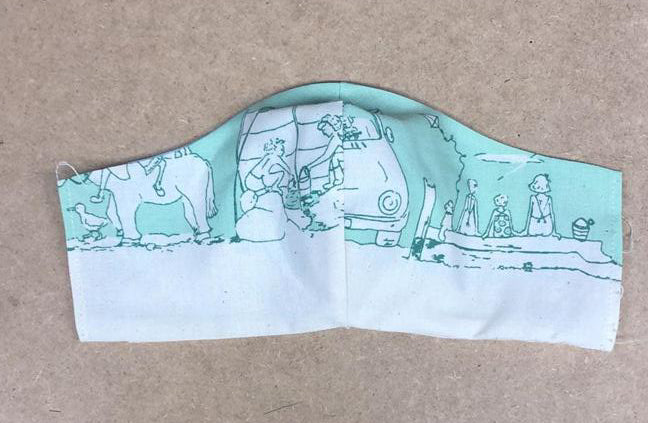
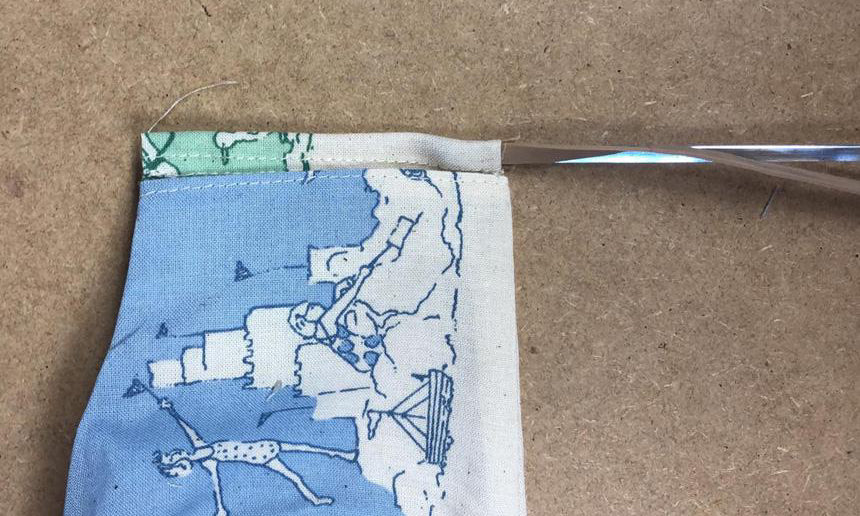
If you turn your mask over, you will see the raw edges of the outer fabric. These edges need to be folded twice. Make the first fold 5mm, then the second fold 1cm.
Press and stitch a line as close to the folded edge as you can (see photo). This will ensure you have a big enough gap to thread your elastic through.
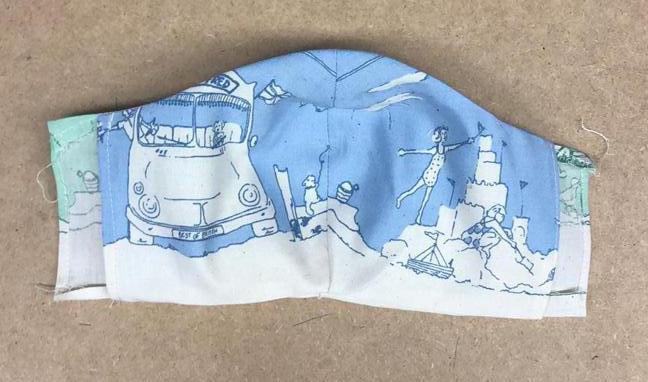
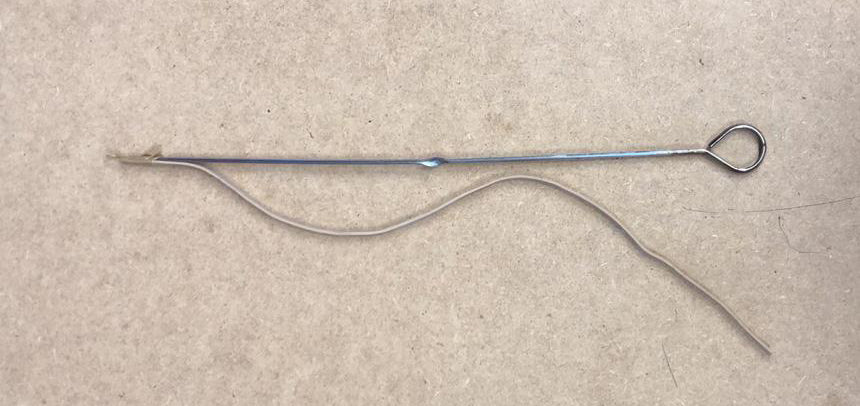
Cut your elastic into two 15cm pieces. Tape one piece to a skewer or attach to a safety pin and thread through one pf the gaps you have just made.
Tie or stitch the two ends of elastic together, adjusting to fit around your ears comfortably but keeping it snug. You don't want a loose face mask!
Repeat on the other side.
8. Changing back to a normal sewing foot, stitch continuously around the edges of your bag using a 1cm seam allowance and leaving a 7cm hole at the bottom of the lining fabric (you leave this hole so you can turn the bag the right way out - so don't forget it!)
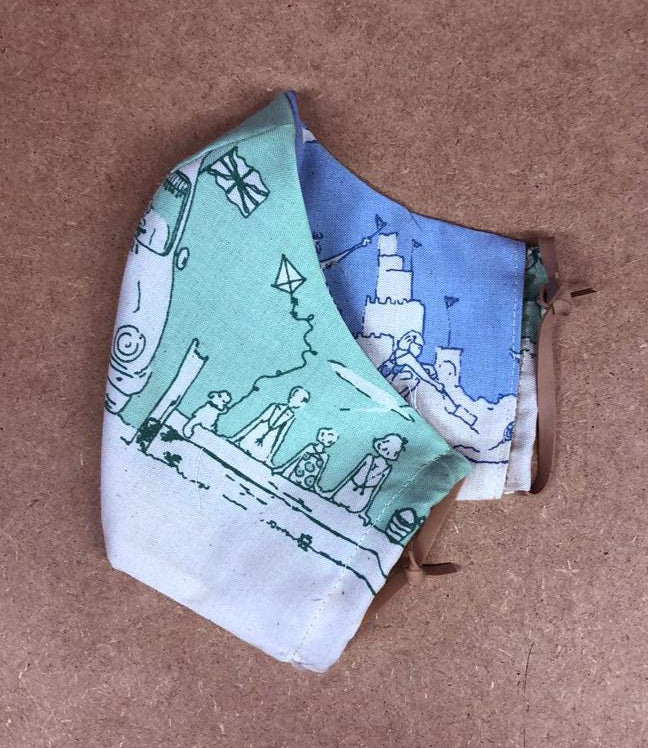
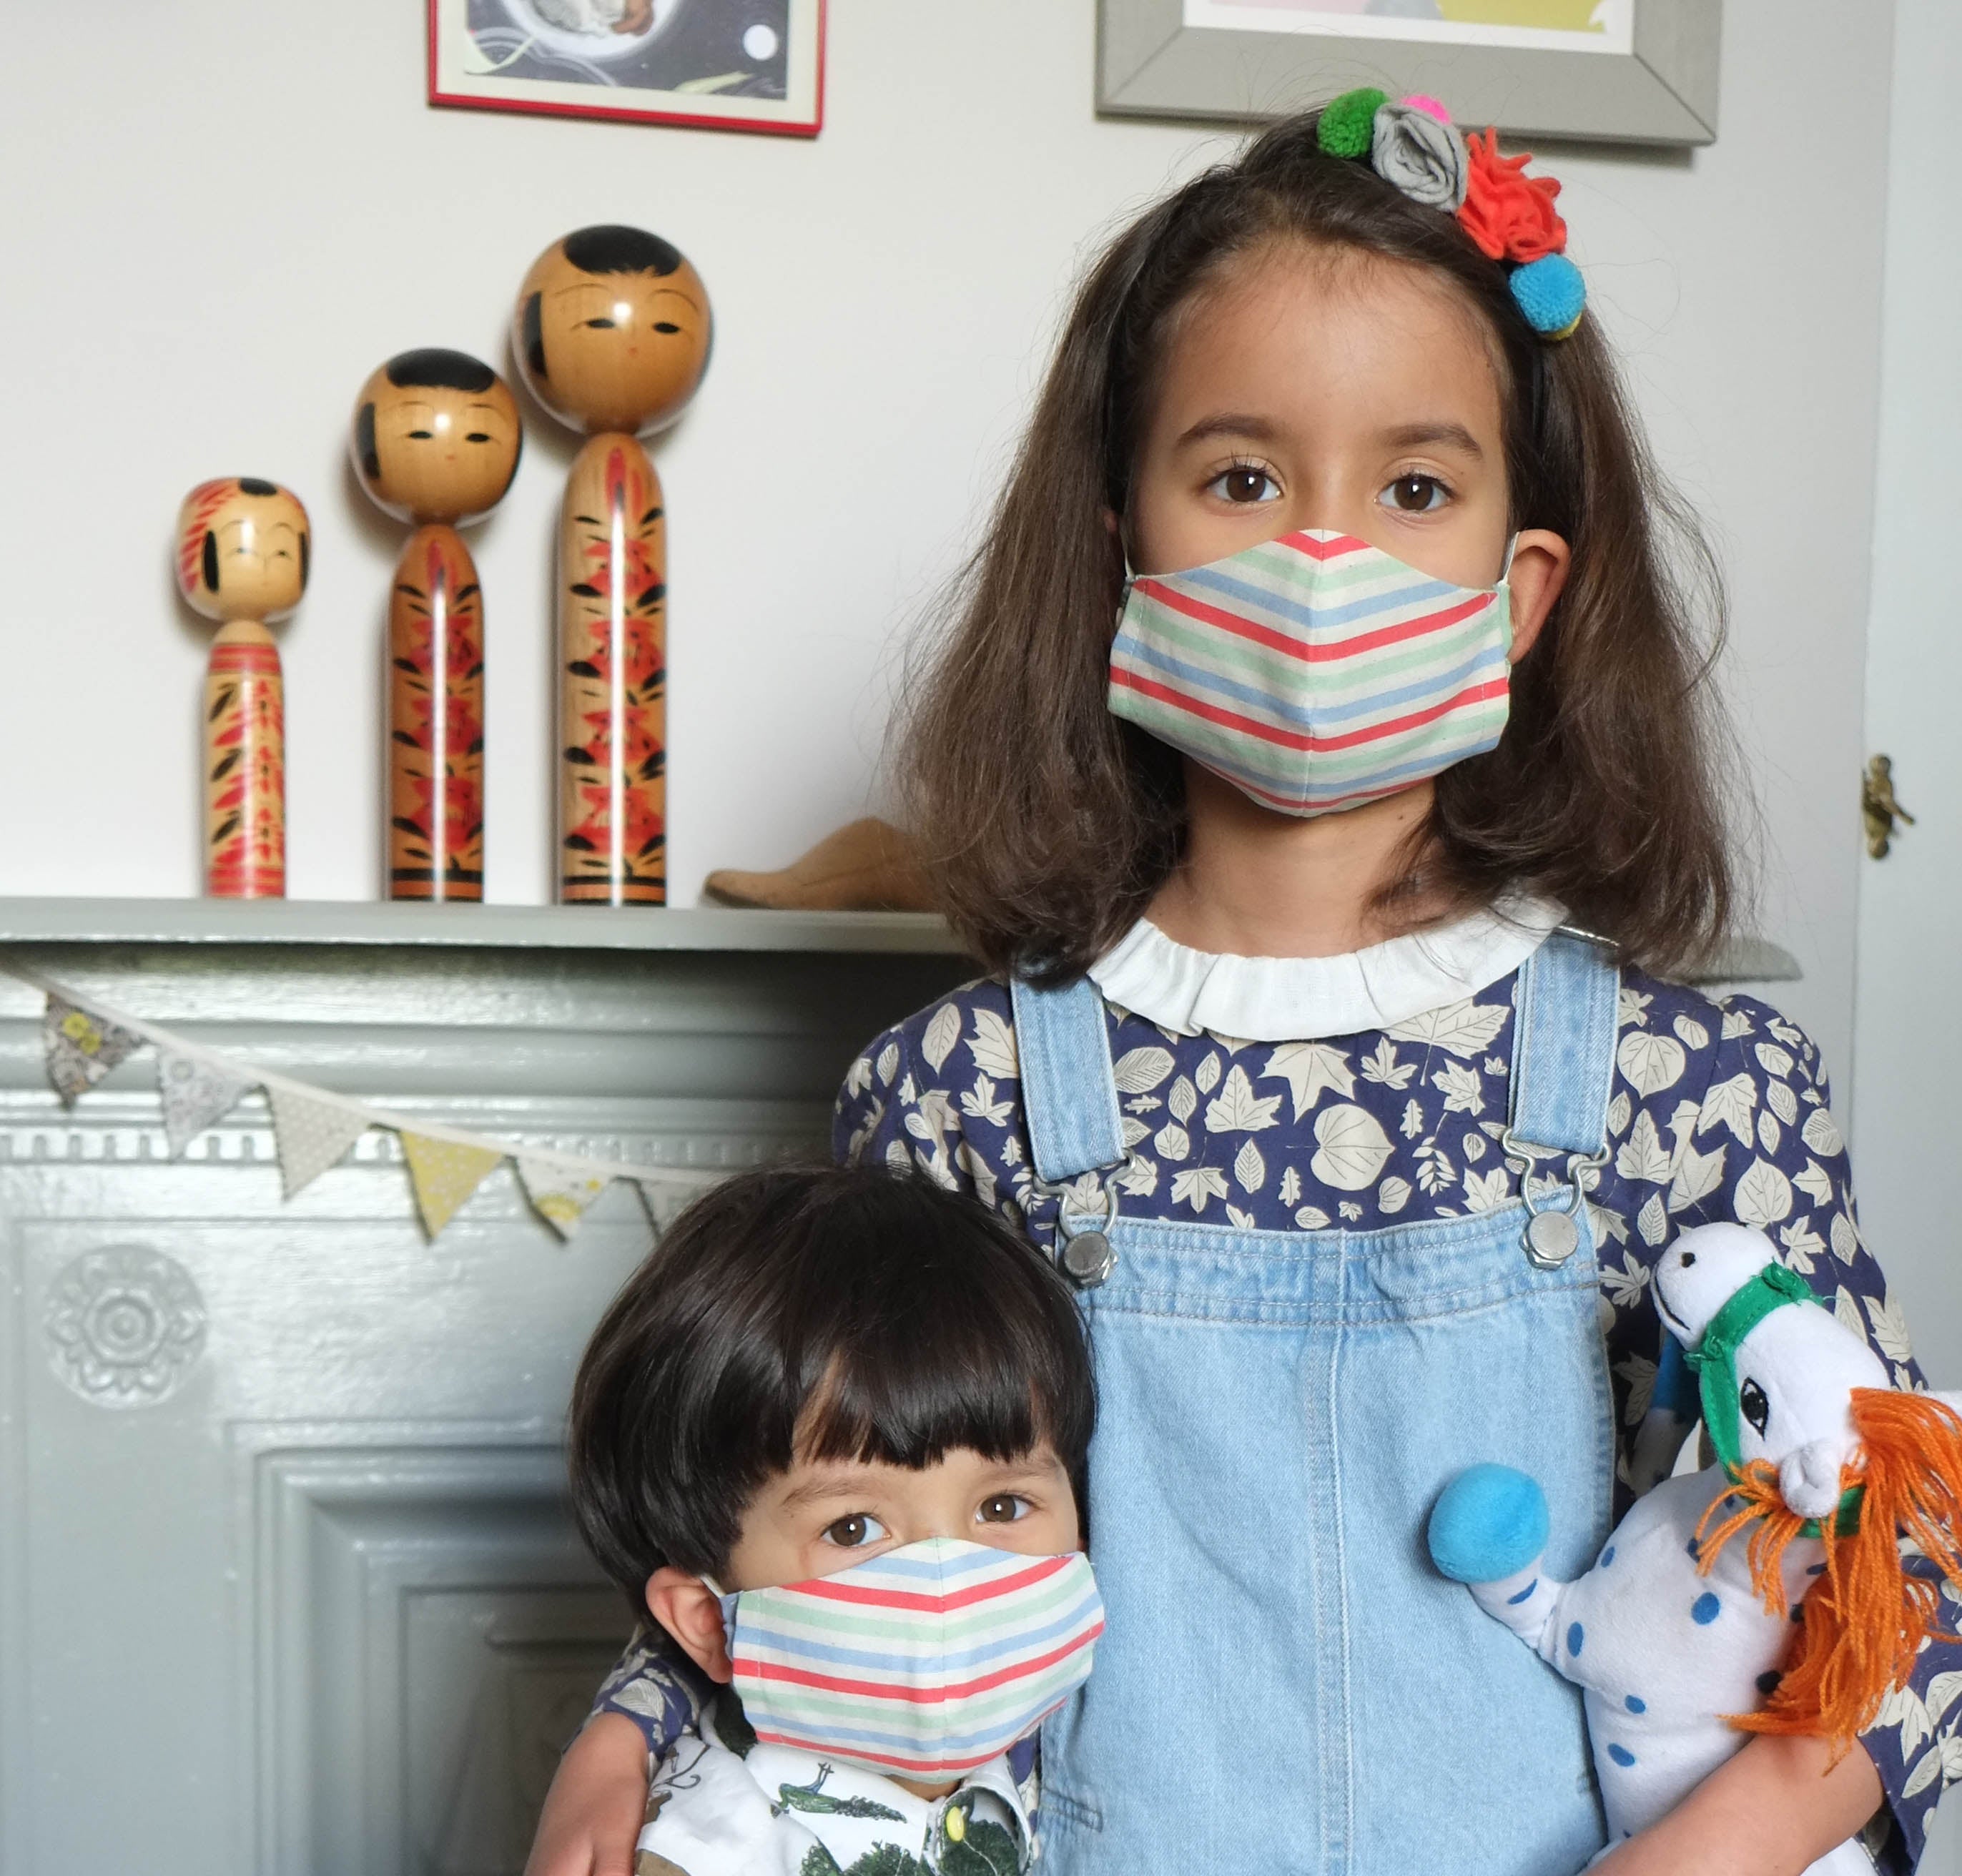
HOW TO WEAR YOUR MASK CORRECTLY
Now to the very important practical bit:
1. Make sure when you wear the mask that the fabric is covering your nose and sitting under your chin.
2. If mask gets wet or humid, switch to new mask and wash damp mask.
3. Never re-use mask after single use before washing it first.
4. Returning from the shops/outside, remove the mask and store it in a bag, before you enter your car or home to not bring in any germs.
5. Only put the mask on and off by touching the elastic loops, avoid touching front of mask.
6. After wearing, put the used mask straight into the washing machine to be washed with your next clothes load on 40C or ideally higher.
7. Wash your hands or use over 70% + alcohol based sanitiser before and after handling the mask.
FILTERS
Now to the very important practical bit:
1. Make sure when you wear the mask that the fabric is covering your nose and sitting under your chin.
2. If mask gets wet or humid, switch to new mask and wash damp mask.
3. Never re-use mask after single use before washing it first.
4. Returning from the shops/outside, remove the mask and store it in a bag, before you enter your car or home to not bring in any germs.
5. Only put the mask on and off by touching the elastic loops, avoid touching front of mask.
6. After wearing, put the used mask straight into the washing machine to be washed with your next clothes load on 40C or ideally higher.
7. Wash your hands or use over 70% + alcohol based sanitiser before and after handling the mask.
